 OSPO Guide
Beginner Guide to Creating GitHub Repos
GitHub for Complete Beginners
A step-by-step guide for creating a repository for people new to GitHub.
This guide is an optional companion to repo-scaffolder. If you’ve never used GitHub or the command line before, start here.
1. What is GitHub and a Repository?
- GitHub is a website where you can store and share project files.
- A repository (repo) is like a project folder on GitHub. It contains files, history, and collaboration tools.
- You’ll use repo-scaffolder to create a repo with the right structure for open source, but first, let’s cover the basics.
2. Two Ways to Create a Repository
Option A: Web Browser - The Easy Way
-
Go to GitHub.com and log in.
- You will need a GitHub account
-
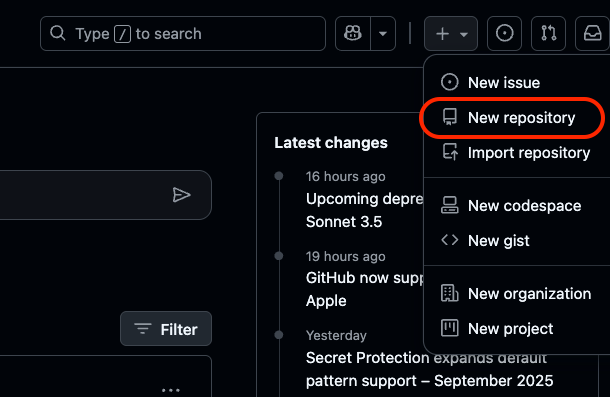
Click the + button (top right) → New repository.
-
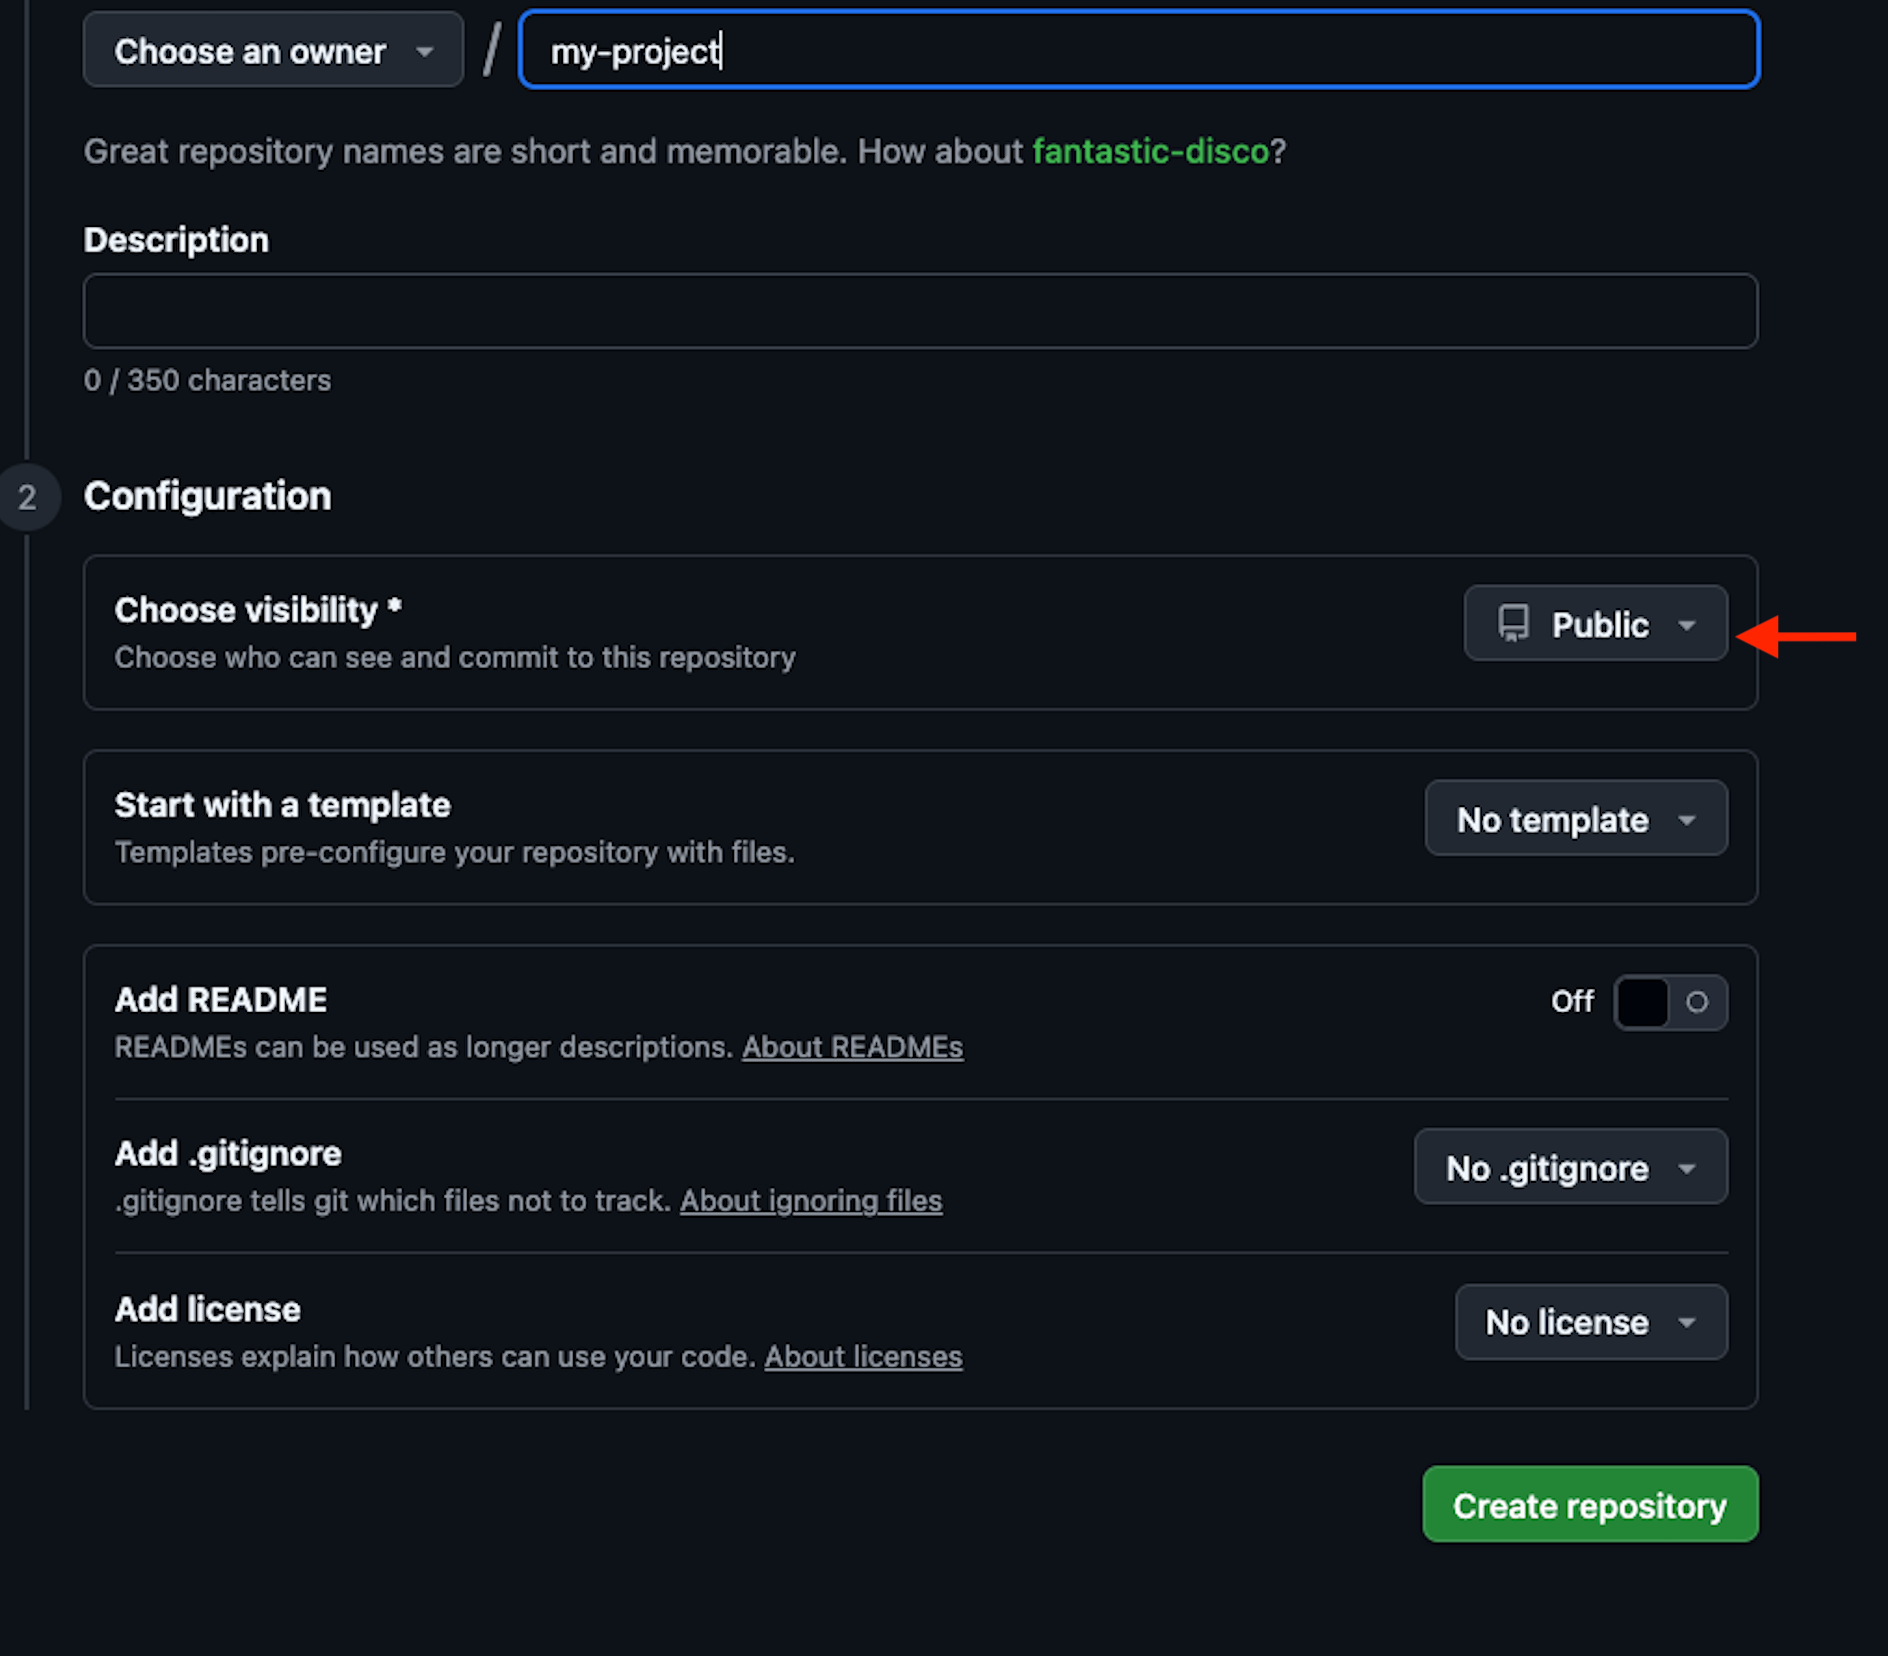
Give your repository a name (for example:
my-project). -
Choose Public.
-
(Optional) Check Add a README file.
-
Click Create repository.
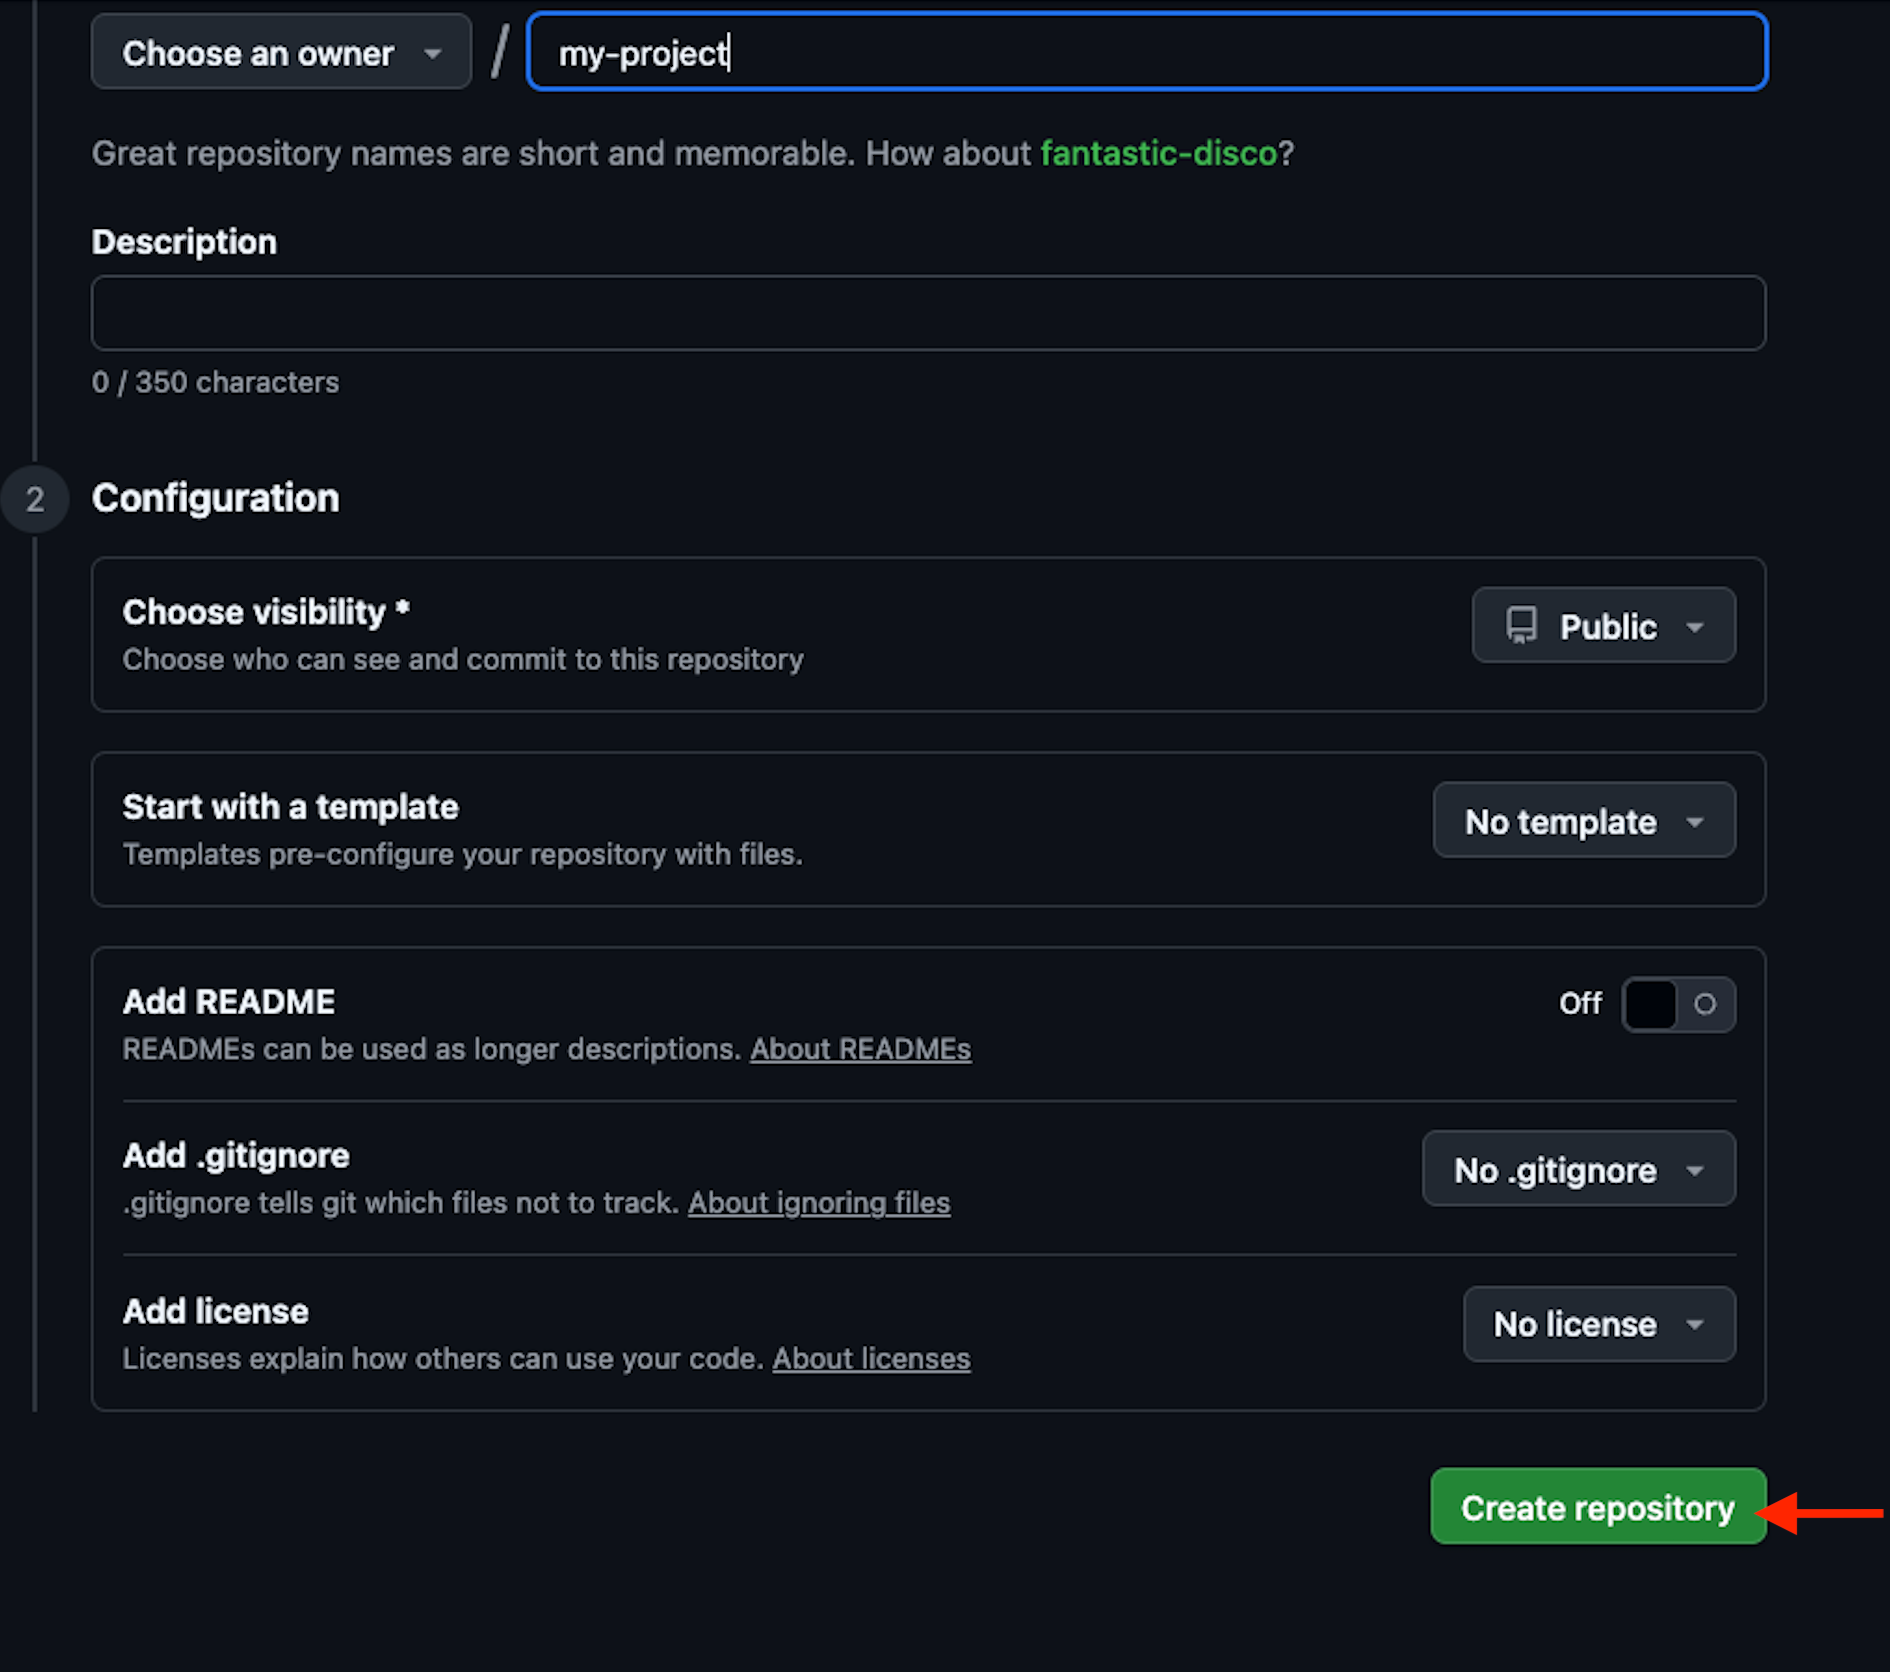
Your repo now exists on GitHub!
Option B: The Command Line (CLI)
If you’ll be using repo-scaffolder, you’ll need the command line. Think of it as a text only workspace where you type commands instead of clicking buttons.
Open your terminal:
- Windows: Install Git for Windows. Open Git Bash.
- macOS: Open Terminal (Applications → Utilities → Terminal).
- Linux: Press
Ctrl+Alt+T.
Check that Git is installed:
$ git --versionYou should see a version number. If not, install Git.
Create a local repo and connect it to GitHub:
- Make a project folder and go inside it
$ mkdir my-project
$ cd my-project - Start a Git repo
$ git init- Create a README file
$ echo "# My Project" > README.md #Mac/Linux OR
$ echo # My Project > README.md #Windows PowerShell- Save it into Git
$ git add README.md
$ git commit -m "Initial commit" - Connect to GitHub (replace USERNAME)
$ git branch -M main
$ git remote add origin git@github.com:USERNAME/my-project.git- Upload (push) to GitHub
$ git push -u origin mainNow your repo lives both on your computer and on GitHub.
3. Working with repo-scaffolder
Instead of building everything by hand, repo-scaffolder gives you templates and checklists that match open source best practices.
Once you’re comfortable with the terminal basics above, you can run:
$ cookiecutter https://github.com/DSACMS/repo-scaffolder --directory=tierX (where X is the maturity tier your project needs).
Repo-scaffolder will walk you through questions, create the repo with the right files (like LICENSE, CONTRIBUTING, SECURITY.md), and help you meet open source requirements.
4. Using Repository Templates
Once you are comfortable creating repositories, you can use repository templates to set up a new project that meets open source and organizational requirements.
Each maturity model tier requires specific file and documentation, such as project information, security policies, licensing details, and contributing guidelines. These ensure transparency, collaboration, and long-term sustainability.
To get started, use the tools provided in repo-scaffolder site to create a new project from a template.
Repository Templates are found here:

